
Everything You Need To Know About Eevee Box
, by Austin Ellis, 39 min reading time
, by Austin Ellis, 39 min reading time
Hello, Trainers! I’m back with one of the strongest decks in the current metagame that is not getting nearly enough love: Eevee box! This deck seeks to utilize the power of Noctowl’s Jewel Seeker Ability to search for any two Trainer cards, providing a near-flawless setup once you get going. This deck is slightly complicated to play and punishes misplays a little more aggressively than other decks in the format, but don’t let that scare you! Once you master the setup lines you’ll be looking to establish, the deck can overpower nearly every matchup, and I truly think there is no real bad matchup. Some would argue Gardevoir is an unfavoured matchup, and while I mostly agree, I do think that learning the ins and outs of the deck can allow you to skillfully navigate the matchup in your favour.
I played Eevees for the North American International Championships, and made last-minute list changes that made the deck even more complicated to play and resulted in some missed opportunities to close games out. This past weekend, I played this updated exact 60 to three League Cups and managed to snag two wins and a second place. I simply think this deck is fun and it also happens to be a good meta call—able to fight its way through any matchup with some luck as well as knowledge in how to play the deck well. In this article, I’m going to discuss the list, some of the tech choices I see other people floating around, and matchup plans for some of the top decks in the format!
|
Pokémon (23): 4 Hoothoot TEF 126 4 Noctowl SCR 115 1 Eevee MEW 133 1 Eevee PRE 074 1 Eevee ex PRE 075 2 Flareon ex PRE 014 1 Leafeon ex PRE 006 1 Sylveon ex PRE 041 1 Fezandipiti ex SFA 038 1 Latias ex SSP 076 1 Lillie’s Clefairy ex JTG 056 1 Mew ex MEW 151 1 Terapagos ex SCR 128 2 Fan Rotom SCR 118 1 Iron Bundle PAR 056 |
Trainers (27): 3 Crispin 2 Boss’s Orders 2 Iono 1 Briar 1 Cyrano 1 Professor Turo’s Scenario 4 Nest Ball 3 Ultra Ball 2 Buddy-Buddy Poffin 1 Counter Catcher 1 Energy Search 1 Night Stretcher 1 Super Rod 1 Switch 1 Tera Orb 1 Sparkling Crystal 2 Area Zero Underdepths |
Energy (9): 2 Fire Energy 2 Lightning Energy 2 Psychic Energy 2 Water Energy 1 Grass Energy |

For NAIC, I decided to switch to playing a Glass Trumpet last minute. I saw some chatter online about it, and I felt this tech choice was a nice surprise and can make some come-from-behind plays possible that Eevees is not usually known for. I’ve seen the tech talked about previously, but hadn’t really considered it, but had decided to give it a try. Unfortunately, the card did seem to underperform. After the tournament, I decided that the Glass Trumpet was clunky and did not actually solve any problems that the deck has but rather fueled them with dead draws and making these combo plays much more difficult to pull off than they needed to be. Since these plays were relatively difficult to pull off anyway, the Glass Trumpet really didn’t make sense in hindsight. While having the option to use it was nice in theory, the actual execution of those turns was easier said than done. After NAIC, I decided to cut the card and have not considered it again. Focusing more on consistency and just resiliency, I settled on playing Iron Bundle in this slot instead. There were several instances during testing before this Cup weekend where I found that simply having an Iron Bundle smooths out so many lines of play in a variety of matchups and allows for much more aggressive opens against any decks that require setup such as Gardevoir, Dragapult, Charizard, etc. Often times, my opponents went with a very simple Arven for Buddy-Buddy Poffin+TM: Evolution to setup. Using Iron Bundle here allows me to use Crispin and effectively a Boss’s Orders in the same turn. This tech choice proved invaluable throughout the tournament run being able to be a third or fourth Boss’s Orders (in tandem with Night Stretcher to re-use it if needed).
![Iron Bundle (056/182) [Scarlet & Violet: Paradox Rift]](https://shop.bastiongames.ca/cdn/shop/files/a0f3e272-ef42-52a2-808a-091d24adf4c1_800x.png?v=1734378668)
So many lists have had Energy Search in and out of the list, and I have settled on it being a required slot in the list. During my testing and tournament games, there have been too many games where an Energy card needs to be searchable off a Noctowl without using your Supporter for turn. Especially in games where you need to aggressively use Boss’s Orders to clear a threat early, being able to search for an Energy and/or a Sparkling Crystal from your Noctowl to round out setting up the Flareon without having to use Crispin can be the difference between winning and losing. Moving forward, Energy Search is a necessary addition to the deck.
Earthen Vessel may seem like an easy replacement or smarter inclusion than Energy Search, however, the cost of having to discard a card to play Earthen Vessel is vastly detrimental and non-synergistic to the deck. Most times, it’s difficult to decide what you should discard even with Ultra Ball, and having another card that discards important late-game resources in the early turns can cause unnecessary difficulty in closing out the game. Additionally, you’d prefer to have more Energy in deck for future use with Crispin or Flame Charge, so taking another Energy card out of your deck does not synergize with the what the deck is trying to do.
Another tech I’ve floated the idea of playing is Bloodmoon Ursaluna ex. This tech is one I’m still seriously considering; however, the problem comes from deciding which card to cut. My current list has been proving to do well without it, so I fear it will simply be a win-more card at best and detrimental to the game plan at worst. However, Ursaluna being able to close out late games with a single attachment (or no attachment!) out of nowhere can help win a lot of otherwise unwinnable games. After lots of testing, I’ve found that including it only simplifies lines of action that already exist, and that you would rather just plan ahead and manage attachments more effectively with the existing list. Ursaluna is essentially a “lazy” 60th card, and when playing the game, I’d prefer every card pull its weight as much as possible. This deck already has a few cards that are necessary to play but do not pull their weight in every game nor matchup such as Briar or Cyrano. The difference is that these cards can actually swing matchups in one way or another, whereas Ursaluna is more of a crutch to lean on when you didn’t plan ahead properly. Overall, I don’t believe that cutting any card in this list for the Ursaluna is correct, as the card may be dead in some matchups and doesn’t offer the deck anything it can’t already do with proper planning.
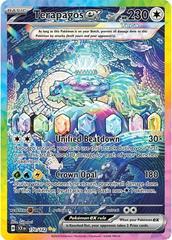
The last slot I wanted to discuss is the Terapagos ex. In my experience, since adding Leafeon ex, Terapagos has naturally pulled its weight since we now run Grass Energy. Being able to utilize the Crown Opal attack has proved invaluable to the matchups you will encounter in any tournament. Crown Opal walls decks like Raging Bolt ex and Joltik Box, preventing them from hitting into your Terapagos, letting you take prizes at your pace. It’s important to note that when going for a Crown Opal line, you want one or zero two-prize Pokémon on your Bench as much as you can avoid it. This way, you can control your opponent’s prize trade as much as possible. The card choices I’ve seen in this slot are the second Eevee ex or a Wellspring Mask Ogerpon ex. The second Eevee ex, in theory, is very good to have access to. However, since you want the versatility of being able to attach Energy to Terapagos, attach Sparkling Crystal, and swing for 240 damage out of nowhere, the second Eevee ex falls short of offering a toolbox of options to fall back on. While it may setup Flareon more consistently, it does not actually win games more consistently. And in some matchups, you’d rather keep one-prize Pokémon on your Bench as much as possible, so in the possible scenario where you evolve your active Eevee ex and have to bench another one, this can open you up to vulnerabilities. Wellspring Mask Ogerpon ex has its usefulness, however, I think the card does not actually accomplish its intended goal as consistently as other cards could. Eevees is generally not a deck that can abuse its Torrential Pump attack on subsequent turns easily, and the deck generally loses when you are set back in attachments on the board. Shuffling back three Energy is counterintuitive to this game plan and the potential of taking two prizes on two little setup Pokémon when Shaymin exists in the format is not enough to make this a worthwhile inclusion. The Sob attack can be an effective stalling technique to setup if you are faltering a little and need more time, however, a lot of times those games are losing battles anyways and you’d rather just go to game 2 to try again with a better set up.
Ian Robb’s top eight Atlanta Regional list played two Night Stretcher, and this is one of the pain points I’ve found with the list in its current iteration. The second Night Stretcher is a card I would like to find the space for again, however, having to fit the Leafeon in the deck along with the realized necessity of Iron Bundle makes it hard to find the space. In my opinion, I feel that the only acceptable cut for the second Night Stretcher is the Iron Bundle, however, the Iron Bundle has pulled too much weight for me to justify cutting it. If you would prefer more recovery, this is the slot I would make for the second Stretcher and I would not fault you for going with this option. Give both versions a try and decide for yourself how you prefer to play. What I realized though is that every time I thought I wanted the second Stretcher, I found that you simply have to plan several turns ahead with the recovery you have, and it generally turns out okay. Prize check for your Super Rod as well and plan your prize trades and recovery around this. If you are playing against Grimmsnarl, you may want to save the Super Rod as long as possible in case your Leafeon goes down to recover the Leafeon and the Grass Energy in one fell swoop. Generally, Leafeon will tank that matchup all on its own, but it’s best to not open yourself up to weird gameplay scenarios that can make you lose in otherwise locked up games. Playing 1 Stretcher commands much smarter and forward-thinking resource management, and if you are confident this is something you can achieve in a long tournament weekend, I would suggest this route as it allows you to play more versatility without sacrificing much in consistency.

MATCHUPS:
Grimmsnarl ex (80/20):
This matchup is easily one of Eevees’ most favourable matchups. You rely heavily on Leafeon ex to tank against this deck, so on your first deck search ensure you have the following cards: Leafeon ex, Grass Energy, Sparkling Crystal, Super Rod, Switch, Professor Turo’s Scenario and at least 2 Eevees. If you prize Grass Energy, you’ll need to rely on Sparkling Crystal to attack with Leafeon. If you’ve somehow hit the extreme difficulty and prized either both Grass and Crystal or your Leafeon straight up, you will need to get aggressive with your Flareon attacks and leave your 50HP Eevee in the deck to evolve at a moment’s notice once you take the Leafeon off the prizes. Setting up for the easy two-energy attack, Verdant Storm, can swing for an easy two prizes into any active Grimmsnarl. However, you really want to set up the proper energy to use Moss Agate. This incredible attack one-shots Grimmsnarl ex and heals 100 damage from each of your Benched Pokémon. This undoes essentially all your opponent’s work with Munkidori and Froslass from the previous turns.
The ideal game plan in this matchup will be to lead with a Flareon ex to set up the energy on a benched Eevee to evolve into Leafeon. This Flareon will take the first one or two prizes with Flame Charge while also setting up the Flareon. If your opponent sets up a Grimmsnarl from here, it’s more likely they swing into the Flareon for 180 and stack damage on the Eevee that will soon become Leafeon. This 30 damage is negligible. As on your next turn, you will want to pay the retreat cost on Flareon properly (don’t use Switch or Turo as much as you can help it!), and ensure you’ve sculpted your hand to use Moss Agate on the next turn, erasing 100 of the 180 damage Grimmsnarl did to your Flareon.
This next turn is where it’s crucial that Switch and Turo are in the deck. Grimmsnarl will often attempt to utilize Maractus to Corner stall one of our Pokémon and set up damage on the Bench. If we aggressively get rid of these switching options early, we could be dead in the water, so we want to make sure these are available to use at all times. What I’ve also found is that sometimes the correct play is not to knock out a Grimmsnarl with Leafeon but instead to use a Boss on the one Froslass they may have setup. This will set back the efficacy of Munkidori to spread damage, and using Moss Agate at this time will save you lots of headache. Balance this choice with whether or not they have a decent chance at setting up a backup Grimmsnarl or not. If they have one Grimmsnarl, your Leafeon won’t get knocked out by their next Shadow Bullet attack, and if they have little to no cards in hand, knocking out their Froslass may be a more correct play in the long run so their Munkidori will not work. This also reduces the efficacy of Maractus to stall since, if they’re not ticking up damage on your Pokémon with Abilities, their Corner attack will eventually knockout whatever they’re stalling Active and will unlock your Leafeon to attack again. Overall, this matchup will often be won by a solo Leafeon taking five or six of your prizes. Sometimes, your setup can be a little shaky, but if you can take two to three before your opponent, the game should be a lock.
Gholdengo/Dragapult (80/20):
![Gholdengo ex [Holo] #139 Pokemon Paradox Rift Prices](https://storage.googleapis.com/images.pricecharting.com/11c597774a41617344beda7c894543fbb251729dd3ca7ff69799887077c5bea2/240.jpg)
Gholdengo is historically one of the best matchups for Flareon, however, it is easier to mess up than you might think. The important thing to remember in this matchup is always having your next Eevee/Flareon set up. In my top four match at the first league cup I won, I ensured this with a tricky play which I learned by losing to Gholdengo at NAIC: my active Flareon ex was knocked out after I knocked out one of their Gimmighoul. I ensured that I evolved this Flareon from my 50HP Eevee that evolves in the same turn it was played if it’s Active. Then, I used Super Rod to shuffle the Eevee, Flareon, and a Fire Energy back in my deck, used Nest Ball to search the Eevee, Cyrano to find both copies of Flareon that were now in deck (the second copy was still in there from the previous turn) and a Fezandipiti ex. I retreated into the Eevee that I just recovered, evolved into Flareon, then used Noctowl to search Energy Search and Sparkling Crystal to Flame Charge again, putting a Water Energy on the Active Flareon ex now, threatening a Carnelian on any Fezandipiti ex they may want to bench and effectively setting up checkmate. This put me to 3 prizes with both Flareon ex setup. In tandem with this, I made sure to have at least one Hoothoot in play to search out my Briar for their following turn. While Gholdengo rarely plays hand disruption, I wanted to ensure I had Mew, Fezandipiti, and that Hoothoot able to redraw into as many cards as possible to secure victory with Briar to close it out. Essentially, as with any other matchup, the less you have to setup on subsequent turns, the better your Noctowls will be to close the game out later. This play made sure I didn’t have to worry about setting up Flareon, but I could instead focus my attention on just finding the game-winning Briar instead. If I just had a Flareon active but no Flareon on the bench, this would open up a play where they could potentially hand-reset me, draw a bunch of cards and force my Noctowl uses to finding the Flareon again rather than actually closing the game out.
Dragapult ex/Charizard ex (50/50):

Dragapult and Charizard have been some of the most dominant decks in the format since their release. After rotation, both cards have come together in an amalgamation of strengths that benefit each other: Drakloak’s draw power coupled with Charizard being able to one-shot most Pokémon in the late game and assisting Dragapult with its Energy attachments is a deadly combination. However, Flareon has the benefit of being a vastly more aggressive deck and takes prizes faster than PultZard can usually deal with. The skill in this matchup lies in your ability to evolve your Eevees correctly. This is the matchup where you want to be able to evolve your Eevee ex first and set up the 70HP Eevee on the Bench with a Water and a Fire Energy from the Flame Charge. You will often take the first prize, meaning you are activating your opponent’s Counter Catchers. You will want to limit or have no two-prize Pokémon on the Bench that they can take at this point in the game. The PultZard player is then usually forced to smack into the Flareon ex. From here, if they’ve only set up one Charizard ex, this is where you can pivot into the 70HP Eevee on the bench, find your Grass Energy, evolve into Leafeon, and use Moss Agate to heal 100 from the Flareon that just got hit and one-shotting the Charizard in the process. If they chose to chase down the 70HP Eevee, this will mean their prize mapping is skewed for the rest of the game, you get access to Fezandipiti, and you will then try to put together a Leafeon knockout using the 50HP Eevee. Their follow up may be to use the Charizard to knockout your Leafeon, which would be worst case scenario. You will want to put together finding this Eevee again, retreating into it, finding the Leafeon ex to immediately evolve into it again, and using Crispin or Energy attachment+Sparkling Crystal to take a another knockout on their Charizard ex. You will be at one prize, and they will ideally be at 3 or 2 prizes left at this point, if you’ve managed your bench correctly.
From here, it should not be too terrible to chain together another KO to take your last prize card. Always remember that if your setup is stunted/not perfect, or if they falter at all, you can utilize Sylveon ex’s Angelite to shuffle back in specifically their Charizard line to have them attack only with Dragapults. You can also switch up which Pokémon to shuffle in based on the information at hand.
![Sylveon ex - SV08: Surging Sparks [DOUBLE RARE] [Near Mint] | Ozzie Collectables](https://www.infinitycards.ca/cdn/shop/files/590069_800x.jpg?v=1735697877)
In top 8 of the cup that I got second, my opponent only had 1 unknown card in hand. He had a Charmeleon, Charmander, Fezandipiti, and Drakloak on the Bench and a Drakloak active. He did the correct play when facing a Sylveon and sent the Drakloak active, however, I followed this up with a Boss on his Fezandipiti and Angelite’d his two Drakloak to stunt his setup and reduce the amount of cards he can see on the following turn. I was betting that his last card in hand wasn’t a draw Supporter and I was correct! From here, he bricked his draw, I smacked into the Fezandipiti for 160 on my next turn and set up for the KO. His next turn saw no progression, and I then knocked out his Fezandipiti gaining a substantial lead. His next turn found the Charizard to evolve the Charmeleon, but I responded with a quick Iono + Verdant Storm to ruin his board. Sylveon’s Angelite cannot be underestimated in any matchup and can be used to utterly ruin your opponent’s setup or set them back multiple turns. Magical Charm may not be the most explosive attack ever, but crucially it knocks out Dragapult ex in one hit with Clefairy on the Bench. Also, that sneaky -100 damage it puts on the Defending Pokémon can take many opponents by surprise, as it did in my finals match versus Adam Kalamat. After using Magical Charm on his Active Clefairy ex, my Sylveon was knocked out with a Munkidori using its Adrena-Brain Ability, I sent up a Latias ex hoping he would try to knock it out, which he did. When I stopped him taking his prize cards, he was surprised to be reminded the Clefairy was hit with a Magical Charm and only did 120 damage to my Latias. Ultimately, this match was still going south for me very fast as my board was lackluster in the two games we played. Always keep in mind how you can utilize Sylveon ex to disrupt your opponent’s board even in dire circumstances that seem unwinnable.
Gardevoir ex (45/55):
Most Eevee and Gardevoir players would rate this matchup as closer to a 70% in Gardevoir’s favour, however I do not feel this is the case at all. Certainly, against a skilled Gardevoir player such as Henry Chao or Isaiah Bradner, you will probably have a bad time. At NAIC, I lost to the one Gholdengo I played against but beat 3 Gardevoir players. Is every Gardevoir player the best? Certainly not, but the results speak for themselves as I also had to topple a Gardevoir ex in top four of the third League Cup I played that I ultimately won as well. With enough matchup testing and preparation, any skilled Eevee player can pick their spot and really punish slower setups or any missteps the Gardevoir player may have made. The important thing to note is that Gardevoir cannot attack with Miracle Force using an empty Gardevoir on any turn that they can only setup one Munkidori and must use three Psychic Embrace attachments on the Gardevoir. This is because Munkidori removing 30 damage from the Gardevoir will leave it with 280 HP left, letting you get a one-hit knockout on the Gardevoir. This can limit their plays by some amount, and you will also generally take the first prize or two. If you manage to take the first two prizes with your Flareon ex before they can respond, you will generally be setup to be able to win the game from here.
Their ideal plan will be to use Mew ex to knockout your Flareon, but this is also a free two prizes you can take. The important thing here is to ensure you have Mew and Fezandipiti on the Bench so you can draw out of a possible Iono to two cards on their next turn. This will still be based on how well Mew and Fezandipiti can draw you out of these situations. Keep in mind that, sometimes, using Angelite to shuffle in the Pokémon they committed all their energy to and a Munkidori can brick their setup and let you win from an easier board state. This list used to play Kieran as another switch out for Maractus and to help one-shot Gardevoir. (It also serves in being able to one-shot things like Bloodmoon Ursaluna with Terapagos ex and a full bench, or with a Bravery Charm with Carnelian.) However, I have not found that the inclusion of this card has actually helped the matchup that much. Not playing Kieran does remove the potential for these plays to be possible, however, I approach the matchup in a more aggressive pace than them and taking prizes faster where they can’t keep up. This is also where Iron Bundle comes into play. Through testing this matchup, I realized that you will often find yourself tied two prizes to two prizes, and they have no two-prize Pokémon on the Bench to gust for the win. They will typically be swinging with Miracle Force in this position, however, being able to use Iron Bundle to bring up any of their Benched Pokémon and using Briar to take your last two prizes on any of their one-prize Pokémon has closed many games for me. As I said before, if you play this matchup against any experienced Gardevoir player, you will probably lose. Since you won’t always be playing against the highest level of player piloting this deck, though, you can expect the matchup to still be unfavourable but also winnable where you can find your spots to outplay your opponent and take advantage of their relative inexperience.
Raging Bolt ex (65/35):
Raging Bolt ex has the potential to attack turn one for a one-hit knockout on most of the two-prize Pokémon you play. Understanding this, you will need to approach the matchup attempting to start with a completely one-prize board state. If Raging Bolt manages to get a knockout turn one, you’ll need to aim for it to be either on Fan Rotom or on an extraneous Hoothoot. Typically, Raging Bolt does not get going without using multiple two-prize Pokémon in play. You can take advantage of them taking an early prize lead by using Counter Catcher to take a quick two prizes, and mapping 2-2-2 on your prizes. It’s also important to note that they generally cannot attack for big knockouts unless they use Teal Mask Ogerpon ex, which is weak to Fire types. This allows you to Flame Charge, take two prizes, and set up your next attacker. Your next attacker that you set up can safely be a Lillie’s Clefairy ex, Mew ex, or another Flareon. This set up effectively “checkmates” your opponent since they cannot deal with both Flareon and the other Pokémon you’ve set up.
![Lillie's Clefairy ex (056/159) [Scarlet & Violet: Journey Together]](https://tabletopgiant.ca/cdn/shop/files/623483_1000x1000.jpg?v=1746125490)
Lillie’s Clefairy and Mew are safe to set up in this matchup doing this, both of which will one-shot all their two-prize Pokémon. This matchup is generally going to always be favoured, and there shouldn’t be much trouble mapping your prizes based on your board state. It’s also important to note that in some games where they are relying on Noctowl to set up consistently, you can disrupt their setup by using Fan Rotom to take easy knockouts on their Hoothoots, forcing them to find a gust to take two prizes if they want to. Generally, they will need to play Crispin or Professor Sada’s Vitality to take knockouts, eliminating Boss as an out to surpass the Fan Rotom. This will disrupt their prize trade yet again moving the game in your favour. This matchup is also one where Terapagos ex shines. You can power through aggressively with Flareon, but this can open you up to potentially inconsistent set ups, however, setting up Crown Opal can guarantee a string of attacks that can take up to four or five prizes by themselves. Once you get to two or one prizes left, their Bloodmoon Ursaluna ex can come out and attack for a knockout on the Terapagos. If they have a full Bench at this point, using Area Zero Underdepths with a full bench can allow something like Lillie’s Clefairy ex to swing for a knockout to finish the game. There are other multiple lines to clean up your last prize cards which should be apparent in the game, so keep an open eye and an open mind!
Joltik Box (70/30):
Joltik Box is a deck that must utilize several two-prize Pokémon. Importantly, you will be unable to knockout Pikachu ex’s in one hit, but there will be plenty of targets beyond this that you will need to gust consistently and take a 1-2-3 prize map. This is one matchup where I felt the Iron Bundle really excelled, being able to force their Pikachu ex out of the Active and taking a knockout on one of their other Pokémon ex. This matchup will generally play out more in your favour than Raging Bolt as this deck does seldom plays hand disruption and does not have a great single-prize attacking option. This is also a matchup where Terapagos shines: use Crown Opal! Most Joltik Box opponents will not think to use Jolting Charge to put four Energy on their Ursaluna ex to prevent this line, so you can easily take advantage of this. However, in game two, if they’re savvy and go for this line, you can simply punish this setup by switching to the Flareon route and leave no other two-prize Pokémon on the field with less than 240 HP. What will they do? They will be forced to either Bloodmoon the Flareon without knocking it out, or a one-prizer, both of which are essentially a missed turn for Joltic box which aims to take quick 2 prizes each turn. Flareon will carry this matchup the most, but keep in mind that Leafeon ex can come into play in this matchup! Punish your opponent’s greedy attachments and one-shot their Bloodmoon before they can even attack with it. There are tons of options in these matchups, and playing the matchup will show you why they’re so favoured.

Important General Things to Note:
1. Keep track of your opponent’s board. Constantly keep in mind if an Angelite can punish their board setup. Keep track if they’ve attached too many Energy in play and if Leafeon can punish this. Keep track on your first search which Eevees you have available. Sometimes it is unwise to evolve the 50HP one right away, as sometimes, you want to be able to jump into a different Eevee out of nowhere to take a surprise knockout.
2. Keep in mind how many Crispin you have available to you and how many Energy are prized. This should be counted on your first search.
3. Be smart about your energy attachments. Fezandipiti ex is often forgotten about as a closing attacker. Even putting 1 Energy on it can let you Crispin late game to clean up your last prize card.
4. If you have the option of what Energy to attach turn 1 going first, prioritize Water Energy. This type is used with each of your evolutions and is the most versatile. If you suddenly need to shift gears to use Angelite or Moss Agate, this will let you pivot without wasting an attachment.
5. As much as I think it is important to get a good amount of energy into play, keep in mind that you should keep some available so that you can retreat a Noctowl if your opponent attempts to Boss stall one. You desperately do not want to have to use your Switch or Turo early—save these resources as long as you can!
6. Always check for your Counter Catcher, Night Stretcher, and Super Rod on your first deck search. These cards will be the difference between a play that works and a play that doesn’t, and if you plan a line based on these cards and they aren’t there, you may end up with an otherwise avoidable loss. All your attacks must be pre-planned in this deck more than in other decks and you can’t plan to chain Leafeon attacks if you have prized your Night Stretcher and Super Rod, for example. Always keep these one-of techs in mind before planning your next move! Even something as simple as planning to use Tera Orb and finding it’s prized can lead to a massive disadvantage if you didn’t plan to have to discard cards with Ultra Ball instead.
7. Your initial game plan will be to use Fan Rotom to Fan Call for three Colorless Pokémon. Buddy-Buddy Poffin will be the first card you want to use if it’s available. Nest Ball is second, and Ultra Ball is your last resort, but you will almost always want to use Fan Rotom no matter what. Occasionally, the line is available to use the 50HP Eevee to evolve turn one into Flareon ex, and if this play is available, I believe it should be utilized. You may need to play a Latias ex down to set this up.
8. Always keep a staggered line of Noctowl available to you on your first turn. Something I almost never do is keep a 2-2 or 3-3 line of Noctowl in my opening hand. If you open two Hoothoot, for example, and you also have Fan Rotom, you should use Fan Call in this instance for either of these combinations: both of your Eevee and a Noctowl; or an Eevee, another Hoothoot, and a Noctowl. I will never keep the same number of Noctowl in my opening hand as I have Hoothoot in play as much as I can avoid it. Simply put, you don’t want these Noctowl to be Iono’d to the bottom of your deck. The less you have in your hand, the more likely you are to draw into them after the Iono. In this same vein, make sure you are getting a Tera Pokémon down as soon as possible. Sometimes you can gauge the speed of this based on the matchup, whether a deck plays a lot of hand disruption or none. So, versus Stage 2 decks, I will get the Tera Pokémon down as immediately as possible, usually the Eevee ex, but Terapagos ex can fill this role if Eevee ex is prized. But matchups like Joltik Box don’t play any hand disruption, so you can hold your ball search for optimal selection at the right time of your game plan based on your draw for turn. Basically, don’t get your hand Iono’d and have no plan for follow up if that happens. Having a Tera Pokémon in play gives you more outs to using Noctowl after the fact, and allows you to setup smoothly from there.

All-in-all, I think this deck has many favourable matchups, especially into the rogue decks of the format. Decks like Typhlosion can crumble under constant Angelite attacks shuffling in their Pokémon, and Zoroark just folds to a single Leafeon one-shotting all their attackers. Gardy may be a sketchy matchup overall, but Gardy is not a majority of the meta, so I think it is a solid deck that will produce results as long as you practice the deck and familiarize yourself with these different matchups and lines to victory. Noctowl decks are notoriously hard to pilot because there are so many decisions to be made, but generally what I will do is figure out what line I want to do and count how many Trainers I will need in order to accomplish this. If I need Boss, Energy Search, Sparkling Crystal, Area Zero, and Buddy-Buddy Poffin, this line will obviously take too many resources. I will usually take the more conservative line that uses the least number of resources, saving them for later in the game. This is a skill I see a lot of players needing to practice more. Being able to save your resources wherever possible also helps make late-games Ionos more reasonable to draw out of. In the finals of one of the cups that I won, the judge commented after the game that it was crazy I got Iono’d to two, and the two cards were Noctowl/Ultra Ball. But I explained that this doesn’t happen on accident for the most part or by pure luck (obviously it is, to some degree; variance is always a factor). Rather, if you play smartly and don’t overextend just to take that one knockout that you *think* will win you the game faster, sometimes, you have a better shot at drawing your crucial resources that will help you recover in the late game.
Thank you all for reading this article! I hope to bring you more content before World’s next month with some of my thoughts, top decks of the new format, and my top picks for the tournament! Follow me on X @prcngnpkmn and feel free to reach out for assistance with the deck and any questions you might have! As always, we appreciate your time and look forward to your continued support!