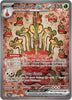
Consistency Hydrapple for Fall 2026
, by Anastazja Clappison, 31 min reading time
, by Anastazja Clappison, 31 min reading time
Welcome to Hydrapple! The best (™) choice for your Louisville Regional Needs. Let’s walk through some cards and how best to use them, before jumping into matchups. Here’s the list we’re currently using:
Pokémon: 21
4 Teal Mask Ogerpon ex TWM 25
2 Chikorita ASC 8
2 Bayleef MEG 9
2 Meganium MEG 10
2 Applin TWM 17
2 Dipplin TWM 18
2 Hydrapple ex SCR 14
2 Meowth ex POR 62
1 Fezandipiti ex ASC 142
1 Celebi MEG 12
Trainer: 26
4 Lillie's Determination MEG 119
2 Boss's Orders MEG 114
1 Lana's Aid TWM 155
1 Ciphermaniac's Codebreaking TEF 145
1 Briar SCR 132
1 Judge POR 76
1 Dawn PLF 87
4 Bug Catching Set TWM 143
3 Ultra Ball MEG 131
2 Pokegear 3.0 BLK 84
1 Night Stretcher ASC 196
1 Unfair Stamp TWM 165
1 Poké Pad POR 81
4 Forest of Vitality MEG 117
Energy: 13
13 Grass Energy MEE 9
This list is similar to the 2nd place Baltimore Regionals list, with some important changes: First, we’ve cut 1 Ultra Ball for 1 Dawn. Many Hydrapple lists were only running 2 Ultra Ball to start with, since you can just Celebi into your Pokemon lines. I do like 3 Ultra Ball for more consistency, and feel the 1 Dawn is just so crucial to have. If one of your lines gets knocked out, you can Meowth into Dawn to get re-established, leaving Lana’s Aid for later if needed. It’s also great in board states where you have a few of the pieces you need in hand already to get your board set up quicker, and means you can sometimes forgo a Traverse Time turn entirely.
The second change to the list is swapping out the Tapu Bulu and 1 Night Stretcher for 2 Pokegear. Bulu’s main use case is for matchups like Slop and Crustle, but I didn’t feel like Bulu put enough work into Crustle to really justify its slot, and Slop is entirely winnable without it. However, the deck does have consistency issues, and if we can get into Meganium, Hydrapple, 2 Teal Masks and some energy, we’re in a great spot no matter the matchup. The Gears allow us to play more games and bench fewer liabilities to get our board set up.
Card Discussion
First, we have our Teal Masks. The biggest misplay I see people making with this deck is not prioritizing getting 2 Teal Mask Ogerpons out with 2 energy each on them. Sometimes this is because people think you shouldn’t be benching them as they’re easy prizes, or they swing less powerfully than Hydrapple, but there is a reason we play 4! They are quite literally the heart and engine of your deck, and you can often find yourself in check-mate board states by having a Teal Mask and a Hydrapple set up. They’re here for more than just draw. A lot of players- myself included- have considered cutting the Briar because you just don’t see opportunities to use it often enough. However, if you map out your prize trade, set up the Teal Masks and prioritize getting energies on them, you will find more and more times where you can make those game-winning plays. If you can’t consistently find turns to play Briar, you may be mismanaging your energy, bench or attackers.
Next up is our Meganium line. These Pokemon are fairly self-explanatory- Meganium effectively doubles the amount of energy you have on board, increasing the damage output for Teal Mask and Hydrapple. You should be trying to get to Meganium in basically every match, but keep in mind that you don’t always need to get it to attack! Sometimes it’s more beneficial to go for a Hydrapple to accelerate more energy, or if Meganium is knocked out later in the game, sometimes you’ll have enough energy on board already to take a meaningful knockout with Hydrapple without it.
The Hydrapple line is your main attacker in this deck. 330 HP is very difficult for many decks to contend with, and the effectively unlimited damage cap means you can deal with even the biggest threats. With each energy on your board counting for +60 damage, a Syrup Storm will KO things like Dragapult and Kangaskhan with 5 energies on your side of the field. With your attachment for turn, 2 Teal Dances and Hydrapple’s Ripening Charge ability, you should be able to easily get 4 energies down each turn. It’s not unheard of to get 5 in a turn with either a third Ogerpon or second Hydrapple. Ripening Charge comes with the added benefit of healing 30 damage when you attach an energy, making spread decks work a lot harder to take all their prizes.
After our main attacking line, we have our support Pokemon. Some are self explanatory- Fezandipiti is included because the deck would love to draw additional cards when possible, and you can also attach + Ripening Charge to a Fez to snipe your opponent’s bench for 100. Meowth is played as at least a one-of in most Hydrapple decks. I’ve decided to play 2 for consistency and because I find we frequently need to Meowth for Dawn or Lillie’s early to get set up, and we want a second one later in the game to close out with Boss or Briar.
Celebi is your ideal starter into most matchups, with its attack ‘Traverse Time’ allowing you to search your deck for up to 3 in any combination of Stadiums and Grass Pokemon. However, keep in mind that Celebi is an easy Clutch/Sob target, where our opponent can force us to keep Celebi active while they set up for a few turns. While I wouldn’t say you shouldnt get into Celebi into these decks, you should be a bit more particular about whether or not to play it down into decks like Slop and Zoroark. If you can reasonably set up without it, it’s preferable to spend another turn setting up than wasting 4 turns being stuck in the active.
Many of the trainers and supporters are relatively self-explanatory. Lillie’s is just the best draw Supporter we have available in format and most decks want to play at least 2 copies of Boss’s Orders. We do run an interesting singleton supporter line, though. I’ve decided to include Cipher despite some lists not running it, as the utility to be able to search for Unfair Stamp, missing pieces of evolution chains, or even energy can’t be understated. Dawn, as mentioned previously, is too valuable not to include. I’m aware the 2nd place list from Baltimore did not run any Dawn, but your options just increase so dramatically in both the early and late games by having one available if you need it. Judge is a previously unusual inclusion, and is only really played right now because of the Alakazam threat. If Zam isn’t popular in your area, you could play 2nd Dawn, 4th Ultra Ball, another energy or Red Card instead. Briar is an insanely powerful card that can be difficult to play optimally. You want to ensure you have at least 2 Teal Mask set up close to the end of the game, with at least 2 energies on each. You need to determine what your opponent’s most likely prize map is and try to push attackers that allow you to play into Briar if you need it. It allows you to take 1 prize to start the game and put on early pressure, and still maintain a winnable prize map despite your opponent often taking the first 2 prizes. It’s especially valuable into one-prize decks! Decks like Hops, Alakazam, Slowking and Honchkrow can be caught off guard by a late Briar to win you the game. You just have to be aware of these plays and manage your resources and board well enough to give yourself that option. It’s the difference of whether you can close out the game a turn early, which can make or break a lot of matchups.
Onto our items! We have Bug Catching Set, PokePad, and Ultra Ball, all fairly general inclusions for consistency. As mentioned previously, some lists only play 2 Ultra Ball, but I do think 3 is optimal just to be able to play more games. In this list, I am only playing 1 Night Stretcher, as many Hydrapple lists were before Baltimore. Be sure to prize check your important evolution line Pokemon, as you will often need to use a stretcher to get a Pokemon in one of your main lines back, or risk being unable to re-establish Meganium or Hydrapple. We’ve cut the 2nd stretcher for 2 copies of Pokegear, which I feel wins us more games by virtue of being able to set up more consistently, and helps us close out games. We’re also running Unfair Stamp as our Ace Spec, which is just the best option for Hydrapple. We need an amount of disruption and it wins a non negligible amount of games. Just having the option to Unfair Stamp ourselves into more combo pieces is also valuable, let alone the disruption to your opponent’s board!
Lastly, we have our Stadiums and Energy. I do believe 4 Forest is the only way to play the deck. I’ve tested the 1- of Festival Grounds and found it largely lacking, inconsistent and generally not worth the slot. For energies, while I would love to run 14, I do believe 13 is enough and prefer having other niche options and combo plays open to me that the lower count affords.
Onto our matchups!
Dragapult
First, let’s go over our Dragapult matchups. A lot of the decision making and lines we can play to are going to be the same across variants, so I’ll start with the Pult Hammers matchup as it’s the most common. Unfortunately, every game into Dragapult is different, so there is no ‘one size fits all’ game plan to teach. However, there are certain board weaknesses we can consider when looking at our opponents set up, and certain ways we can try to optimize our own set up. From the start, you’re going to want to pick 2nd. This gives us the opportunity to Traverse Time on our Turn 1, play a Supporter to find more Pokemon and items, play our Bug Catching Sets and Ultra Balls, and try to get a reasonable board set up without having to worry about Pult Hammering off our energy or Bossing something that can’t retreat before we can get into Celebi. While it does feel bad to start something like Applin or Chikorita that can’t retreat into Celebi, it’s still worth it for the opportunity to play more items and get energies on our Teal Masks. Our ideal board is: 2 Meganium, Celebi, 2 Teal Mask, Hydrapple, Fezandipiti. Sometimes we can’t get to the 2nd Meganium, in which case putting down a second Hydrapple line is also great. Be sure to check your prizes! Benching your small basics only to realize you can’t evolve them will give Dragapult an easier route to take all their prizes. We often need to play a Meowth to get into meaningful late-game swings, so leaving the bench space open after Celebi is knocked out is important. You may have to play down a Meowth to play the game or get lines of Pokemon out early- it is a little unfortunate as our bench space is at a premium, but keep in mind if they go into Budew, you can Tuck Tail for a KO and put the Meowth back into your hand. Then, push either Celebi or Hydrapple after to force Dragapult to have a Boss for relevant damage.
Once we take our first knock out, anticipate that the Dragapult will want to Crushing Hammer your energies, Boss up Meganium if you only have one, Unfair Stamp you, and take the Celebi out with the accumulated Itchy Pollen/ Munki damage to take 2 prizes. Whether or not you can get into a knock out on this turn is going to determine if you can win this game. Luckily, this play requires a ton of resources from the Dragapult player, and if they can get to it they likely won’t also have backup energies dedicated to another Drakloak. If we can KO this Dragapult after the Unfair Stamp we force them into a board where they have to Crispin to attack with another Dragapult, limiting their options on their subsequent turns.
If you can draw out of the stamp, your easiest play is to get into the Hydrapple re-establish the Meganium, and swing. However, in over half of your games, you won’t be able to knock out the attacking Dragapult. If you can get into a Boss KO on a Fez or Meowth, that’s a valid play, otherwise you want to just allow Hydrapple to soak up a hit while establishing more energies on board to get back into the game next turn. If you miss the attack, you do have to hope Dragapult also misses a turn and that you can win in the following 2 turns with a 2 prize KO into a Briar turn. In this board state, your opponent will need to find Boss+ Moltres + Fire energy to take another 2 on their following turn, otherwise they are likely to Boss and spread damage on your Teal Masks to try to set up for a 4-prize turn. If they spread damage like this, keep tabs on how likely they are to get back into Boss + Dragapult swing next turn. If you can KO their only Pult with energies, they won’t be able to take their last 4 this way, but they can still get into an Itchy Pollen to take 2 prizes if you don’t Ripening Charge the one with 10HP left. Check your opponent’s resources, consider their draw available, where their energies are allocated, and how many are played. Oftentimes, late-game Pult can’t close out the game with their ideal swing because they’re missing an important piece, so just make them have it!
Pult/Hammers are also playing Moltres or Dudunsparce ex currently, both of which have the opportunity to throw a bit of a wrench in our plan. Generally speaking, you should plan to retreat your active Teal Mask first turn to avoid giving up an easy 2 prizes if you don’t know whether or not they play the Moltres. If you see a Dudunsparce ex, you can reasonably assume they don’t also play Moltres. The problem with Moltres is that it messes up our prize trade, and if they attack into us with it and we have another Teal Mask on the bench, we need to respect it and get it off the board. You have a few options. If they knock out our only Teal Mask, you can avoid benching more until you can take ~2 prizes with Fez sniping the Kloaks around Moltres, then get to a turn where you Unfair Stamp, re-establish Teal Mask with 2 Energies, and KO the Moltres with Hydrapple. They’re unlikely to get back into Night Stretcher + Fire + Boss at this point, especially if you’ve pressured their draw. Your prize map becomes Budew, Kloak, Moltres, Briar Dragapult. Or, if you’ve already taken out the Budew and they have two 2-prizers on the board you can KO the Moltres and try to play into Boss Boss for game. Keep in mind if they play the Dudunsparce ex that it will do 60 more damage for each ‘ex’ Pokemon you have in play, so be aware of that as a play, especially if you have Fez, Meowth, Teal Masks and Hydrapples down.
Pult/Blaziken is a matchup that *looks* unfavoured on paper, but is actually a better matchup for us than Pult Hammers is. The main thing to remember in this matchup is that it’s just a prize race. Take the first one, have Teal Masks ready to follow up with 4 energy KOs, and play into Briar turn. More specifically, I generally try to target down the Torchic line when I see it. It’s incredibly difficult for us to deal with 2 Blaziken, and their deck swings less consistently without their energy acceleration. This deck has much less disruption, and the fact they don’t play Moltres means we have a clean line to take more meaningful prizes.
The worst Pult variant for us is Pult/Noir. We rely too heavily on our on-board combo pieces, and their whole game plan is disrupting our board. Expect your Hydrapple, Meowth or Meganium to get Dusknoired, and whatever weakness exists on your board to be exploited. Energies, evolution lines, and attackers are all susceptible to being entirely board wiped in one turn. Our only real hope into this matchup is that they brick early, as the deck can be very inconsistent and difficult to set up. Take out the Dusks wherever possible, especially if they leave an evolved one up without popping it. Remember that if you get down to 1 prize, they can’t pop a Dusk without losing. It’s a very difficult matchup.
Zoroark
This is one of our best matchups, but is still loseable if you hit a good Zoroark player who knows what their optimal lines are. Newer lists are playing heavier counts of Judge and Watchtower, both of which can cripple our early game set up by preventing us from playing Meowth and forcing us to reshuffle our Traverse Time. On the bright side, Zoroark has a very difficult time chaining knock outs, and we are usually taking a 2 prize KO every turn. Pair our aggressive prize trade with late-game disruption, and we have a very solid game plan into one of the most popular decks. If you end up on the wrong side of the prize side, remember that you can push a Meganium to take out a Zoroark. Your ideal board set up is 2 Teal Masks, 2 Meganium, 1 Hydrapple, and a Celebi. Once the Celebi is off the board, or instead of a 2nd Meganium early, you can bench a Fezandipiti, but you will generally want to get into 2 Meganiums at some point in the matchup to optimize your prize trade.
Keep in mind that some lists are still playing Tomes, so don’t assume they can’t get back into a relevant knock out. They can also swing for knock outs with the Pecharunt ex in the late game, or use Yveltel’s Clutch to keep your Celebi active long enough to set up. It may not always be optimal to play the Celebi- if you can set up without it, or find an opportunity to take a quick 2 on a Zoroark before fully setting up, I would take the early prizes over stretching for a full board set up. Most Zoroarks are playing Secret Box, so you’re generally not punished for early aggression. If needed, Celebi is still a great option to get set up, and you can easily come back from Zoroark stalling you out long enough to take the first 2 prizes.
Basic Box
This is another fairly favoured matchup for Hydrapple, due to the variety of plays we can make to inconvenience or surprise them. Your optimal setup includes a Celebi, Meganium, 2 Teal Masks, and a Hydrapple. You don’t want to set up a full bench, as their Clefairy can easily knock out a Teal Mask if we do. You would rather force them to have the extra basic Pokemon and the stadium, especially because some lists are playing the Lillie’s Pearl which can mess up our prize map. When setting up, do not bench your little guys until you have the whole line + Forest available, to prevent them from ruining your board with Wellspring Mask. This is another matchup where you need to be aware of retreat lock- They are likely to try to get into a Sob play on the Celebi until they can set up a more meaningful attack. If you can set up without Celebi, do that, otherwise just continue building your board until the Celebi is knocked out, and ideally find a Boss for early aggression. Generally, they should be starting a Kangaskhan. This is your optimal first knock out, if you can get to it. It does require 5 energies on either a Teal Mask or a Hydrapple, so it may take a few turns to get to, but I would prioritize taking down the 3-prizer as your first hit because it allows you to Briar for game with just one more hit. Be aware that their Teal Masks can take easy prizes on your own Teal Masks, especially because our energies will count for double when they're attacking. Generally speaking, you should be swinging with Hydrapple in this matchup wherever possible, as they don’t have a good attacker that can deal with 330HP unless they play the Raging Bolt. Even if they do, it requires 5 energies on their own board for them to take out the Hydrapple, which can force them into undesirable board states later in the game. Lastly, keep in mind that this is a deck that plays 4 Stadiums, so be conservative with your own stadiums. You are likely to get bumped if you play it too early, and you may want them late-game to prevent them from bigger Clefairy plays or having access to Meowth.
Slowking
We love to see our opponent flip over a Slowpoke! Slowking is a very favoured matchup, as a lot of their attackers are essentially useless against us. While the attackers they play may vary, you can reasonably expect things like Metagross (which can’t take out a Hydrapple), Zeraora (which can’t hit a benched Ogerpon) and Kyurem (which is only relevant if you bench your small basics instead of just evolving them all at once). They may also play the Annilape, which just helps with our own prize trade and impacts their ability to chain attackers. As long as you swing with Hydrapple and only bench Meganium and Teal Masks early, you should be able to get ahead on the prize trade by limiting their attack options. Your ideal first knock out is on the Kangaskhan with Hydrapple if you can get to it. Don’t worry if you can’t hand disrupt them, unless the active Slowking is the only potential attacker they have, you should be targeting down the easy 3 prizes as early as possible. Keep in mind if they attack with Zeraora or Kyerum, that they have to discard all their energies. In this situation, you can sometimes get into Fezandipiti to start sniping benched Slowpokes as they’re usually unable to move the active Slowking. This is another matchup where your Stadiums are crucial, as they play 4 Academy at Night. If you can avoid putting down the first stadium, it can end up being relevant later in the game. Also, check their resources before making decisions. They generally don’t play Boss’s Orders, only have 2-3 Night Stretchers, 2 Metagross, and 3 Wonderous Patch. There’s a very real possibility that they just run out of reasonable attackers, especially if they decide to Metagross into your Celebi early. Lastly, keep your Briar available. As a one-prize deck, you may find yourself in a situation where Briar can win you the game, especially if you end up needing to bench liabilities early to play the game. Limit their options, and keep yours open!
Festival Lead
I used to love seeing a Festival Lead while playing Hydrapple, then they released Gladion. Now the matchup actually feels so bad I want to call it a near autoloss. There’s technically the chance that they just don’t know how to play the matchup, but between Seaking with 110HP, Growing Grass giving a bonus 20, and Gladion making 3-prize turns more common, it’s exceptionally difficult to play. You have two different lines you can play to depending on how your opponent plays the game. If they put down the Festival Grounds early and they don’t have anything with more than 100HP on their board, you should try to immediately get into your own Dipplin to take 2 prizes. If they don’t put the Festival Grounds down, you want to actually get into Hydrapple and start swinging. That forces them to find Gladion early, which they may not be able to get to. Bonus points if you can Boss to KO a benched Thwackey! The name of the game is either prize racing or limiting resources, whichever line they allow you to play to. Keep an eye out for rough early starts from them- if they can’t get at least 2 Grookey up, pressure those to prevent them from setting up. If they have a weak start and you have Fez, you can Boss up a Thwackey and Cruel Arrow their Festival Lead Pokemon to prevent them from being able to Boom Boom Groove into a better setup. The deck does need a few turns to stabilize, so try to take advantage of that early to get ahead on the prize race. Keep in mind that if you play your Forest of Vitality they can immediately bench and evolve into their Stage 1s. This isn’t a matchup where you care too much about the Stadium war. Festival Grounds likely stays in play the entire matchup, unless you end up in a situation where you just can’t Dipplin to take your last prizes, it’s fine to keep their stadium up. Lastly, I wouldn’t recommend Unfair Stamping them unless you can put them in a situation where they can’t also Boom Boom Grove twice the following turn. Unfair Stamp actually helps them get into Gladion easier, and their most difficult turns will be where they can’t take two prizes because they can’t reduce their hand to zero to play Gladion.
Alakazam
Alakazam has made a huge impact on the meta lately, and for good reason. It’s a very powerful single prize deck that just auto wins into a bunch of different decks. However, there are a few things we can do into it, and I would call the current list no worse than 40/60. First and foremost, you need to set up your board. You absolutely need to get to 2 Hydrapples, a Meganium and ideally avoid benching Teal Masks or other low HP 2-prizers until late game. Celebi to get your board set up, and ideally start attacking on your second turn with Hydrapple. They need 17 energies to KO the Hydrapple, so even if they have Rare Candy + Alakazam on their turn 2 to knock out the Celebi, they are likely to whiff a turn or two of knock out into the Hydrapple. Once they get to 12+ cards, either Unfair Stamp or Judge them. Then, once they knock out the first Hydrapple, use your other hand reset. Keep in mind that Dunsparce lists are also playing Genesect, which will prevent us from playing Unfair Stamp if they can get to it with a tool. Use your Ace Spec early if possible, or Boss to knock out their Genesect as quickly as possible. Also be aware of Eri. If you have Unfair Stamp in hand on a turn you can’t play it and they’re already set up, you may want to play Lillie’s to shuffle it back into your deck so it doesn’t get discarded.
The other popular Alakazam list is the Dusknoir version. We are *very* favoured into this deck, because of three key factors: One, they don’t play Genesect, so both of our Hand Resets are live for the duration of the game. Two, they don’t play Dudunsparce, limiting their ability to draw to 17. And three, they need to use their Dusks to assist their Alakazams to take knock outs. Instead of trading our 2 prizer for 1 of their 1 prizers, we’re essentially trading 2 for 2. And since we can leverage higher HP Pokemon we can chase the weakness in their board, whether it be only one Pokemon with energy or only one Dusk. We hate to see an Abra, but love to see the Duskull!
Mega Lopunny
Are you noticing a pattern yet? Another solid matchup for us! Mega Lopunny can be knocked out with 5 energy on our board, and gives up three prizes, making this a fairly quick and easy matchup. However, they can manage their board in some specific ways that can make it difficult for us to get our 3-3 prize map. Specifically, many lists are playing Dudunsparce and Moltres now, as opposed to the Bronzong build which was objectively much easier for us. Your ideal board into this matchup is Celebi, 2 Teal Mask, 2 Hydrapple, and Meganium. They are likely to get to a 2-prize knockout on a Teal Mask early, and you’ll need to either re-bench a Teal Mask to get enough energies on your field to KO the Lopunny, or Fezandipiti to draw more cards. You should be able to get into your return knock out for 3 prizes, and ideally Unfair Stamp them after their first knock to lower their chances of finding Moltres + Fire + Boss the following turn. Since they are likely to take out the Teal Masks back to back, you should never be attaching for turn or Ripening Charging to them. Load up your Hydrapples or Meganiums as they’re unlikely to get targeted, and if you can maintain 5 energy on board you can avoid re-benching a Teal Mask. If you need to take the Moltres, keep in mind Briar becomes an option if they push another 1 prizer, which they sometimes will to try to force you into an awkward prize trade. Otherwise you will want to get into Boss to take your last prizes on either the Mew or another Lopunny.
If you hit the Bronzong version of this deck, you’ll want to get 2 Teal Masks up to threaten a knock out right away and start getting energies on your board for later. They may prevent you from evolving your Pokemon, but if you immediately deal with the Bronzong they usually won’t have their board set up well enough to deal with the pressure. Expect to be return KOd with a Lopunny, and try to get into a Hydrapple to keep pace. Their game plan often falls apart at this point, as they’re down 4 prizes and are unlikely to get enough pieces put together to Boss around the Hydrapple to take another relevant knock out. They may also get into Dusknoir + Lopunny to knock out the Hydrapple, but if they go that route you can just clean up the game with Boss or take the Lopunny with the Teal Mask left on the bench.
Mega Excadrill
This is the last matchup I’m going to go over, but it’s another great one for us. In order to knock us out, they need 5 Energies on a Excadrill. In order for our Teal Masks to knock them out, we just need 4 energies. If you can set up Hydrapple, it’s good to get into mid-game as their Metagrosses can’t easily deal with the 330HP. But generally speaking you’re just going to feed the Excadrill one-prizers until you can get 4 Energies on a Teal Mask, and make sure you have a backup Teal Mask with at least 2 energies on it. They do play Hero’s Cape, which adds 100HP. If they do, you’ll need 6 energies on your Teal Masks to knock it out. Keep in mind they may play a Skarmory, but they are likely only getting into that attacker late in the game. Skarmory can’t hit your benched Teal Masks, so avoid benching liabilities like Meowth or Fez if you find yourself in a board state where Excadrill only needs 2 prizes to win. When considering your best attacks, keep in mind that Metang is the core of the deck. If they evolve one into Metagross and try swinging with that early instead of the Excadrill, you can Fez snipe or Boss KO a Metang with Hydrapple to put more pressure on. They generally don’t play Stadiums, so you should be safe to play down your Forests or discard them as needed. Just be sure to double check your math into this matchup! Weakness, Hero’s Cape, and Genesect’s attack will all modify how much you need to take a knock out. Load up your Teal Masks and have fun!
I have plenty of thoughts on other matchups and tech choices, but hopefully this works as a comprehensive guide to the deck. I do believe Hydrapple is incredibly well positioned right now, and that the lower win percentages we’ve been seeing is simply a result of people not knowing how to optimally play the deck, or choosing inconsistent lists. I’m happy to talk more about Hydrapple on my Twitter: Anastazjarca9
Good luck to everyone competing at Louisville this weekend!